


What style is your Halloween decor? This year, express your glam side by making these DIY glitter “boo” letters inspired by Modernly Morgan. This easy craft project will elevate your current Halloween decorating scheme by adding a little extra glitz, glamour, and, oh yeah, glitter! Now that’s what we call boo-tiful.
Making your own Halloween decorations is simple, fun and satisfying. These glitter “boo” letters are easy enough for a beginning crafter to make, but the results are impressive and eye-catching. Once you try creating these glitter letters, you will want to add glitter to all your Halloween decorations!
ALSO TRY: Rainbow paper tube bats
One great thing about this DIY project is that you can express your own personal style by choosing a glitter color scheme you love. You can go with the traditional Halloween color combination of black and orange, or inject some alternate colors into the mix, like purple, green or even pink. Don’t overlook gold and silver as classic glam colors that also play well with Halloween color schemes. If you are bolder, don’t be afraid to go outside the traditional choices and pair Halloween orange with peacock blue.
If needed, purchase a bottle of acrylic craft paint or spray paint to match the color of glitter you choose to use for your version of the project. Paint the letters and let the paint dry before you begin to add the glitter.
To display the finished letters, Glue a loop of yarn onto the back to hang on the wall, or place the letters upright on a bookcase, mantle or side table. Create a pretty Halloween vignette by adding real or faux pumpkins, candles or any other spooky decor that captures your fancy.
>> Click here to jump straight to the craft instructions
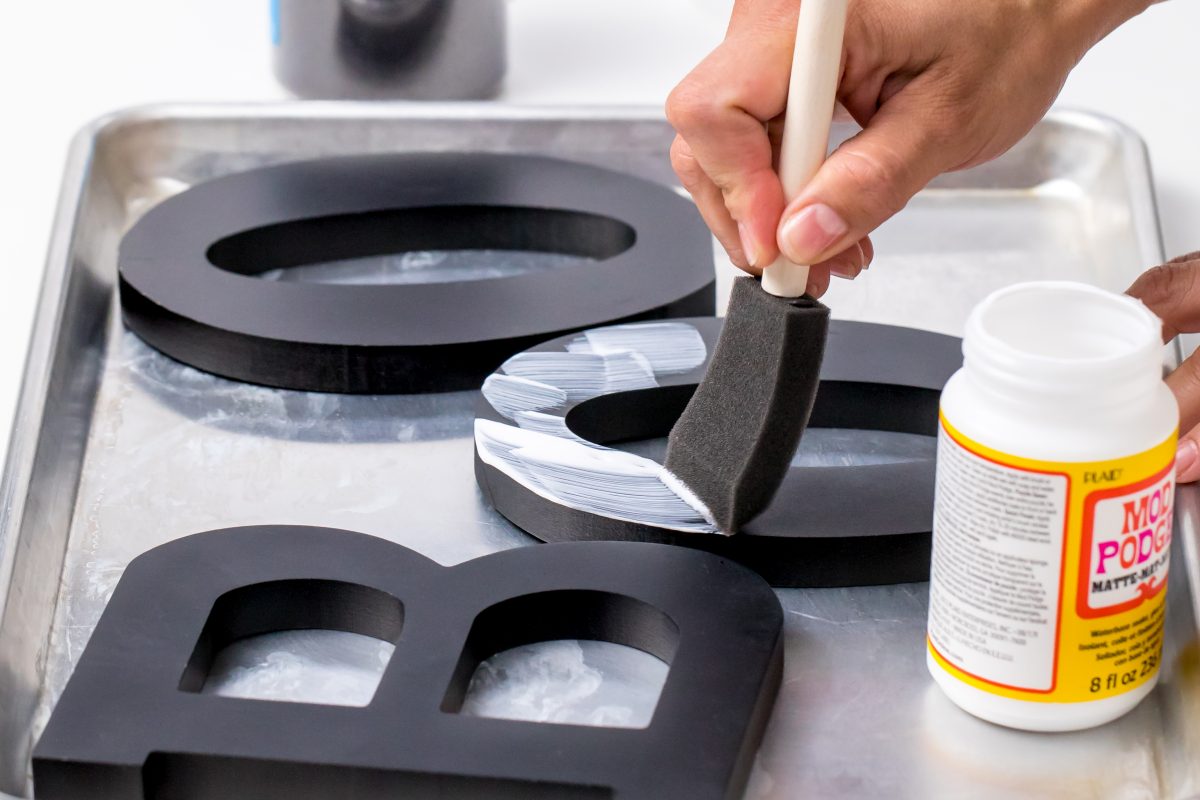
Prepare wooden or papier-mâché letters
Any large craft store will have a variety of papier-mâché or wooden letters to choose from. While you’re there, pick up some Mod Podge decoupage glue, Mod Podge Super High-Shine Spray and a pack of foam brushes.
Begin decorating letters DIY glitter “boo” letters
To contain the glitter, use a plastic tablecloth or a large creased piece of paper (like newspaper or posterboard) so you can reclaim the unused glitter and easily put it back in the glitter container for later use.

Spray letters with Mod Podge Super High-Shine Spray
This will create a polished look for your DIY glitter “boo” letters.

Look at that sparkle!
Gorgeous detail for your holiday decor.

DIY glitter “boo” letters can be used over and over again
Everyone will be asking how you made them!

Materials:
- Letters
- Mod Podge
- Glitter
- Foam brush
- Mod Podge super high-shine spray
Directions:
Note: The color of the letter chosen must match the color of the glitter being applied.
- Generously apply Mod Podge to the front of the letter.
- Pour the glitter over the Mod Podged area.
- Make sure the entire front of the letter is covered with the glitter.
- Allow to dry overnight.
- Spray with Mod Podge high-shine spray to secure the glitter to the letter.
- Add a second coat of high-shine spray for extra glitter security.
