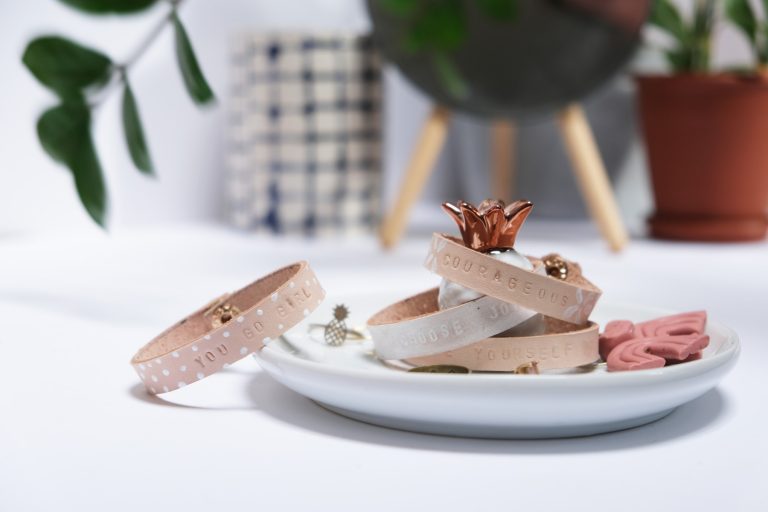
One of my favorite things to DIY is jewelry: It’s pretty easy, you can make a bunch of it, and size and customize it exactly as you wish. Friends, bridesmaids and favorite teachers always appreciate homemade jewelry gifts. And jewelry materials typically come in multiples, so you can experiment and try different styles. Here, we’re making leather motivational bracelets.
I’m not going to lie: Using leather stamps takes practice. Sometimes, you hit the leather stamp too hard and you see too much of an indent; other times, you don’t hit it hard enough to make marks. My best advice is to practice creating letters on scrap leather before you start on your leather bracelets.
Want to create a custom jewelry set? Take a look at our DIY for rainbow earrings!
Our editors & writers only recommend products that we think are awesome and you’ll love. We do occasionally use affiliate links, which means that we may make a small commission at no additional cost to you.
Motivational leather bracelet materials
- Leather
- Leather stamping kit
- Hammer
- Leather snap kit
- X-acto knife

MORE: DIY cork & cement candleholders make sophisticated at-home decor
Step 1
Measure a strip of leather the length of your wrist plus 1.5 inches for the snap. The width of the strip should be 1/4th inch or wider based on your liking. Cut out this strip with a sharp X-acto knife.

Step 2
Before you go any further, I highly, highly recommend practicing your stamping technique so you can figure out the perfect pressure to apply. Another tricky piece is getting the letters next to each other on a line. Again, practice makes perfect. Hold the letter stamp perpendicular on the leather and hit the top of the stamp with a hammer two or three times.

Step 3
Once you have practiced enough, lay out your leather strip and punch your favorite motivational phrase.

Step 4
Time to add the snaps. (I ordered a package off Amazon that included the four pieces for the snap and all the tools you need to attach it. It comes with 200 pieces, so get ready to make all of the bracelets!) Make a hole in the end of the leather, and then find the cap and socket for the first side of the snap. Place the silver pointed tool on top of the snap and hit it a few times with the hammer.

Step 5
Once you have the first snap attached, wrap the bracelet around your wrist to figure out the appropriate place for the other side of the snap. Make a mark, and then use the X-acto knife to create a hole.

Step 6
Grab the close post and the stud to place on either side of the hole. Place the concave tool on top of the stud and hit it with the hammer to attach it.

Step 7
Dress up your motivational bracelets with some paint or leather stain. I love the look of light leather and white accents, so I used various painting techniques on my bracelets.

Looking for another DIY gift? Learn how to make DIY coasters with our tutorial below.


