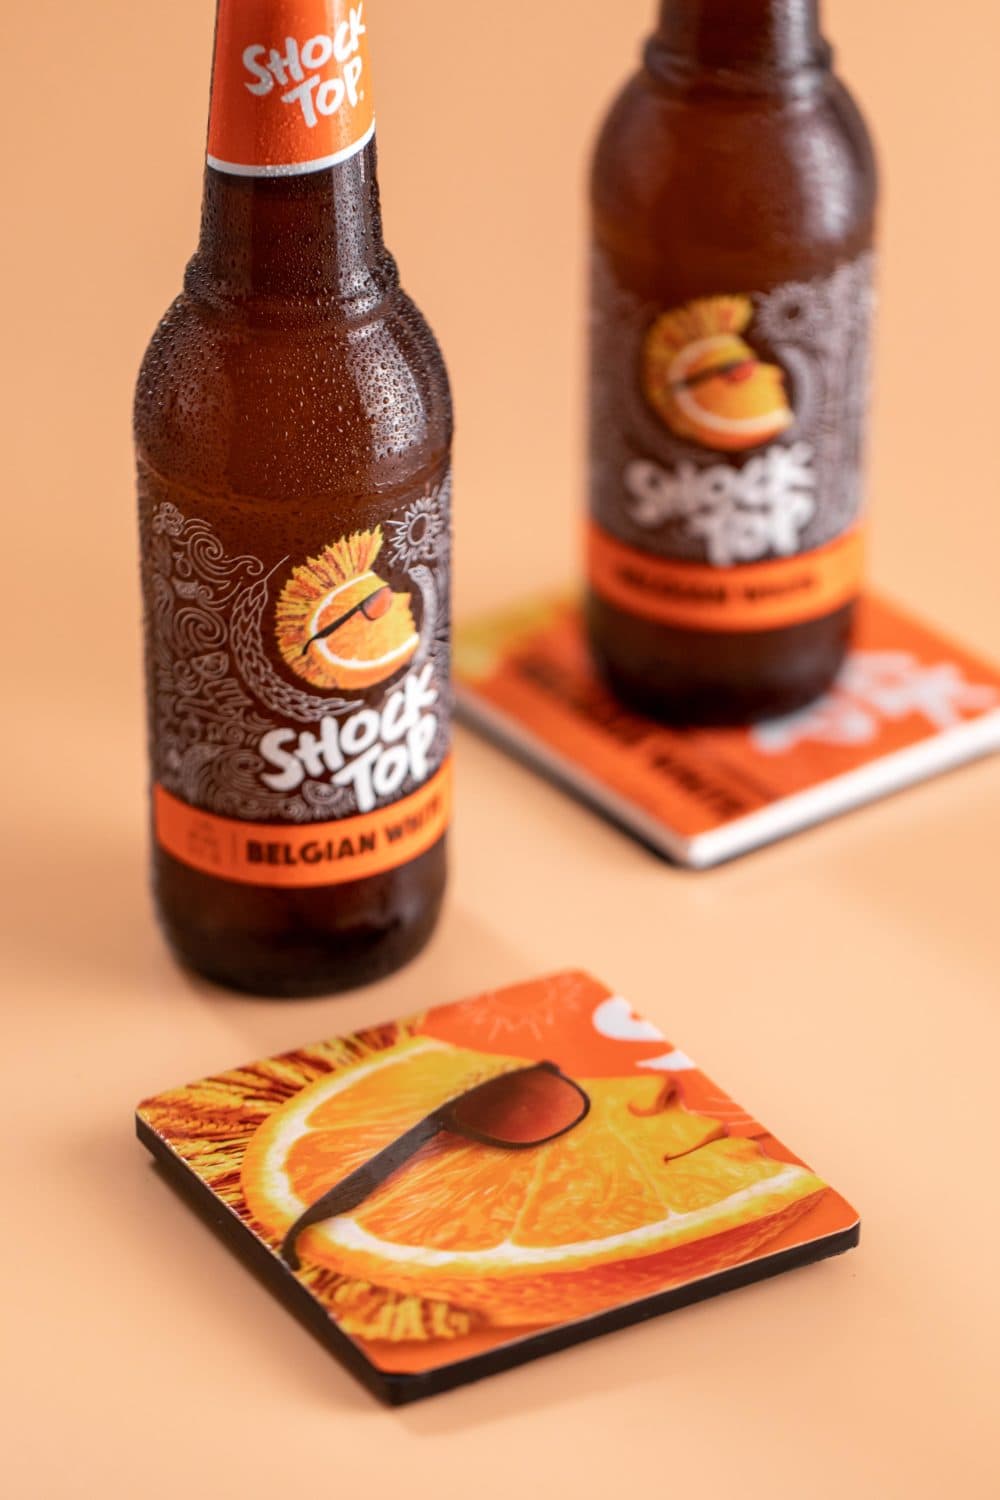
Step aside, store-bought coasters, there’s a new coaster in town and he’s not basic. Made from ceramic tiles and cardboard beer packaging, this simple craft requires minimal supplies and yields a rewarding outcome. Even better, custom beer coasters make great gifts for beer-lovers for any holiday.
A coworker here at TG & Co. inspired me to tackle this craft, and let me tell you, I had to do extensive research and testing to get it just right. Some things you just have to learn the hard way (i.e. through personal exploration), but I did the hard work so you don’t have to. Learn from my mistakes, won’t you? Here are all the tips and tricks to making impressive custom beer coasters.
What you’ll need:
Ceramic tile (square 4×4 inches works well)
Sheet of black felt (felt furniture pads also work)
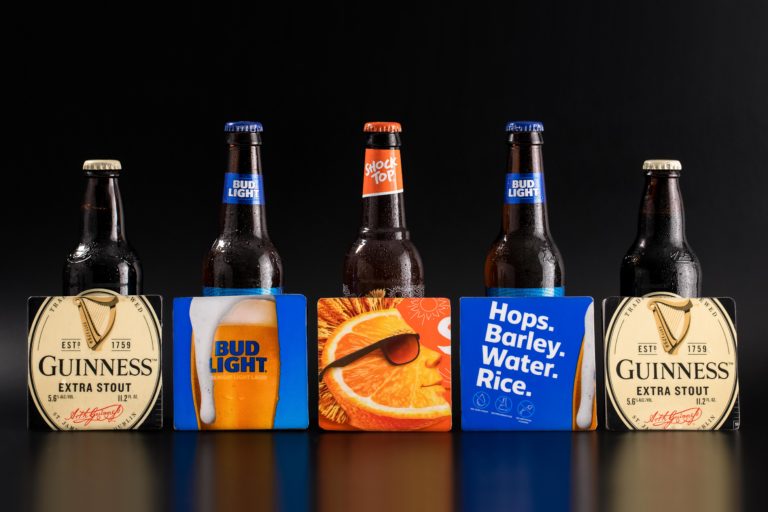
6-pack of beer bottles (for cardboard packaging)
Mod Podge
Gloss varnish
Paintbrush
Scissors
Marker
Step 1
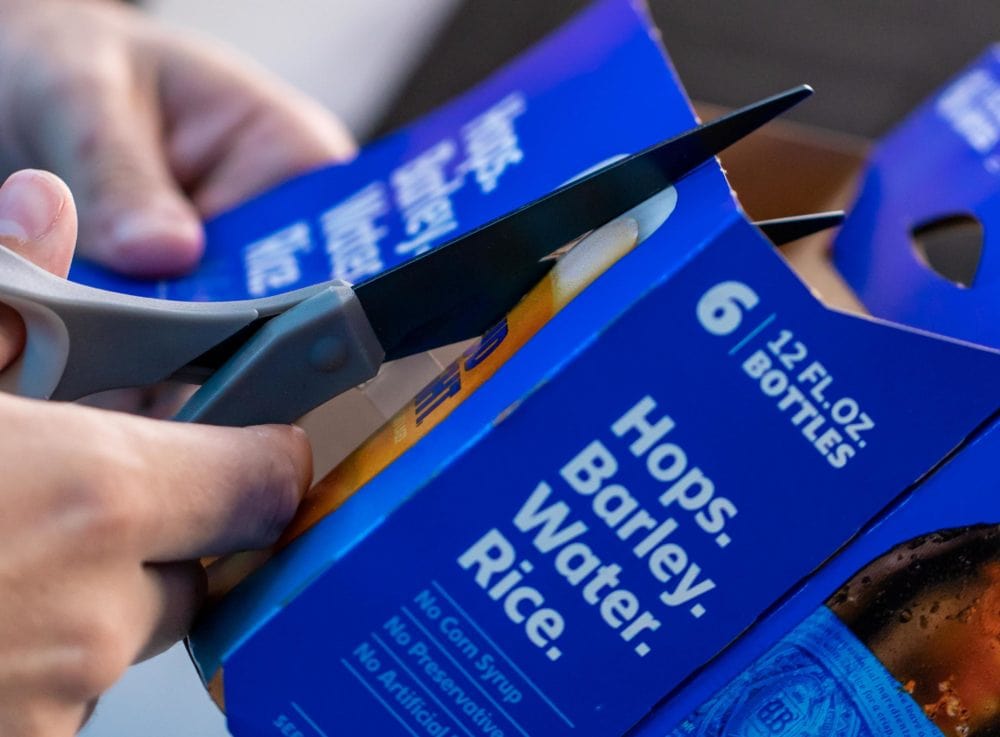
To start, you’ll need to find visually appealing cardboard beer packaging. A six-pack of your favorite beer bottles is perfect, but you can also use cardboard from a six-pack of beer cans.
MORE: How to make a sentimental keychain
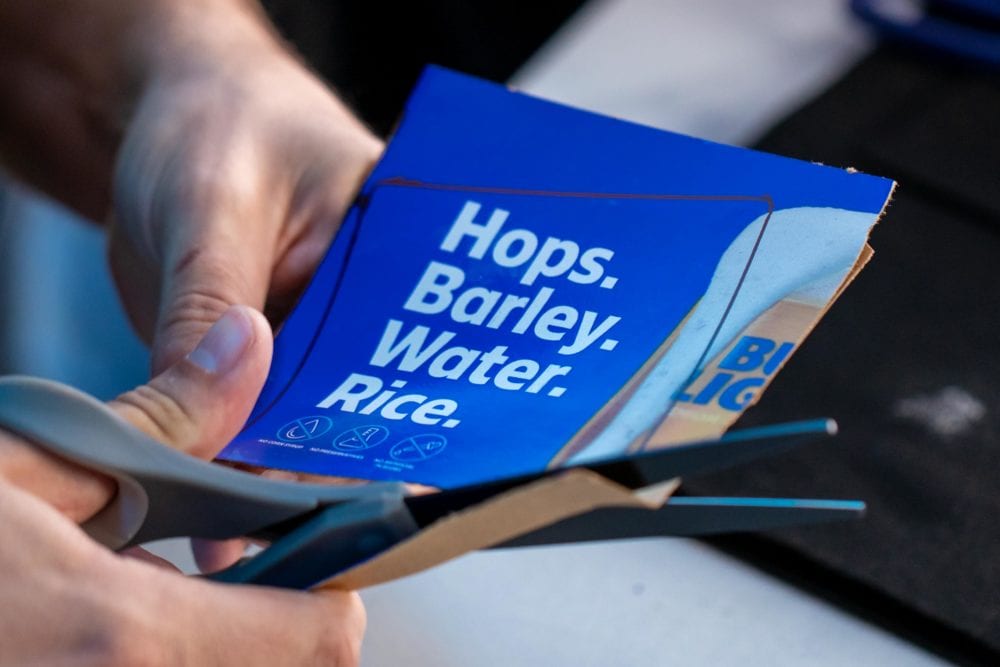
Step 2
Cut off a piece of the packaging that is larger than the ceramic tile. Because this is the part that’s going to be shown on the coaster, make sure it has the image, logo or text you want displayed.
Step 3
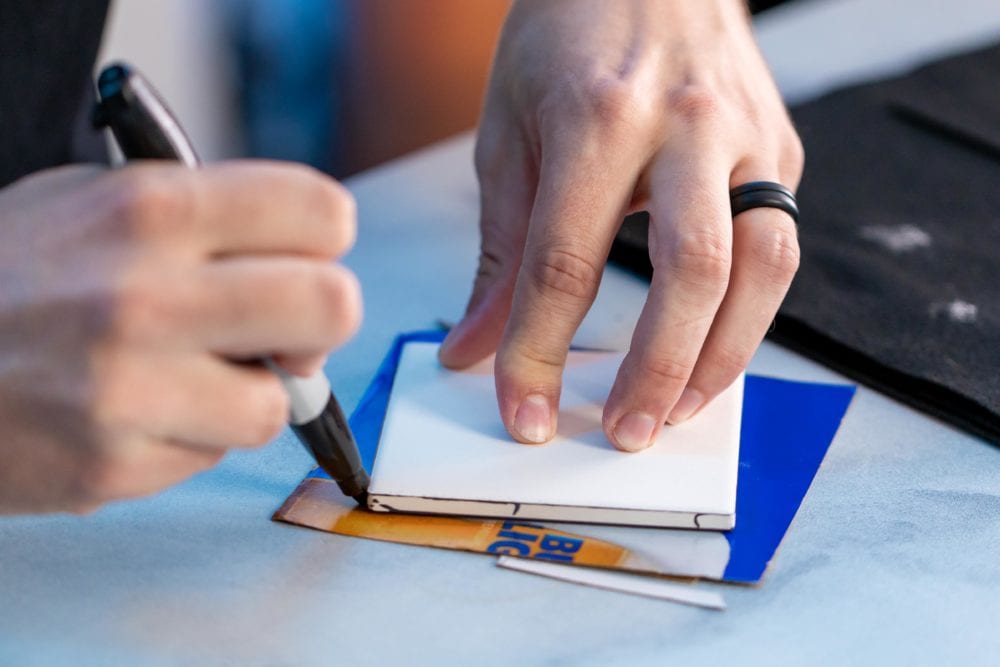
Placing the ceramic square over the cardboard, use a marker to trace around the tile. At this point it might be useful to have a spare tile on hand. That way, if you get marker on the tile during tracing, it won’t be on the final product.
Step 4
Next, take a pair of scissors and cut the cardboard square out. Remember — bigger is better because it can be refined and cut smaller later on. If you are struggling to make the cardboard fit perfectly, you can also cut it into a smaller square instead so that it purposely doesn’t fit the tile. This will create a border around the cardboard.
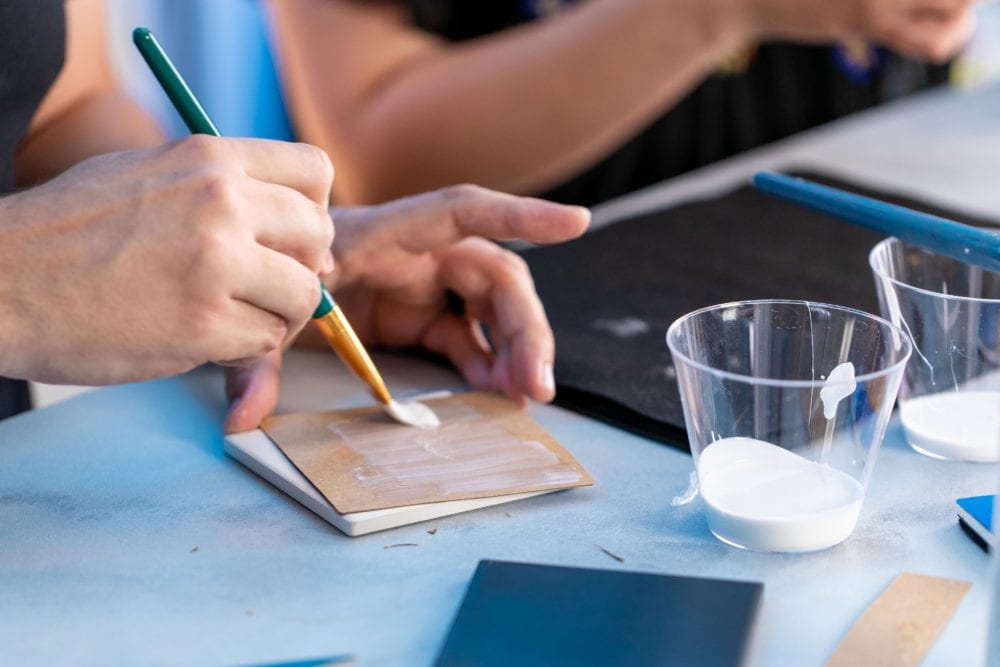
Step 5
Once you have a piece that fits to your liking, apply a coat of Mod Podge (or should I say modge podge?) to the back of the cardboard using a square 1-inch paintbrush. Stick the cardboard onto the ceramic piece and allow it to set for at least 20 minutes.
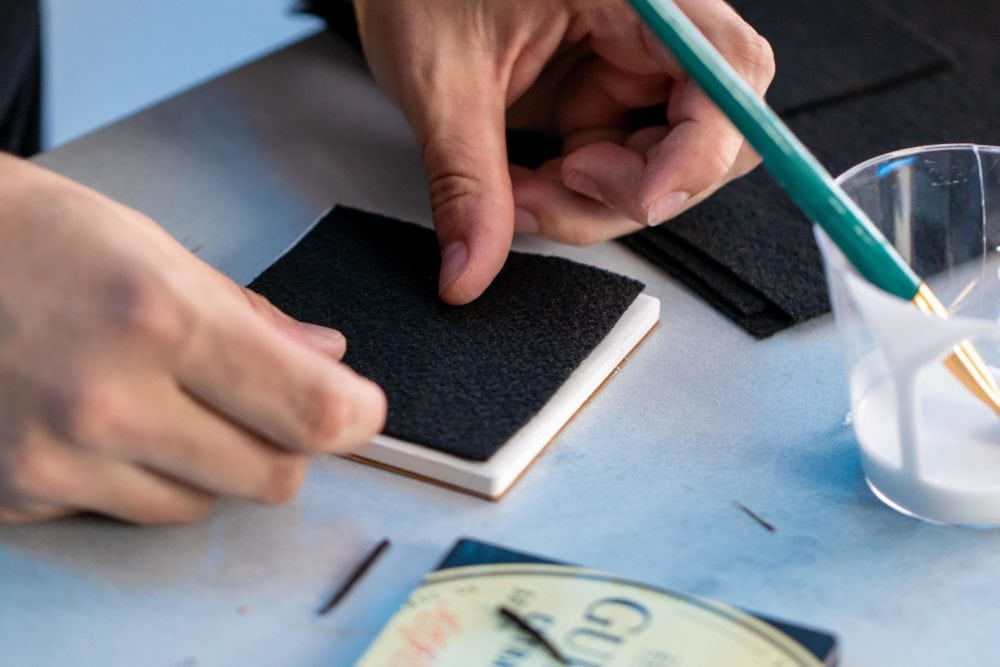
Step 6
While you’re waiting, use your spare tile to trace out a piece of felt. This serves as the underside of the coaster and keeps the ceramic from damaging any furniture. I found that cutting the felt piece smaller than the tile gives the finished product a cleaner look.
Step 7
When the cardboard is done drying to the tile, flip the coaster over and apply a thin layer of Mod Podge to the back and stick the felt on. It’s important that you don’t apply too much, as the felt square is porous and Mod Podge could easily leak out.
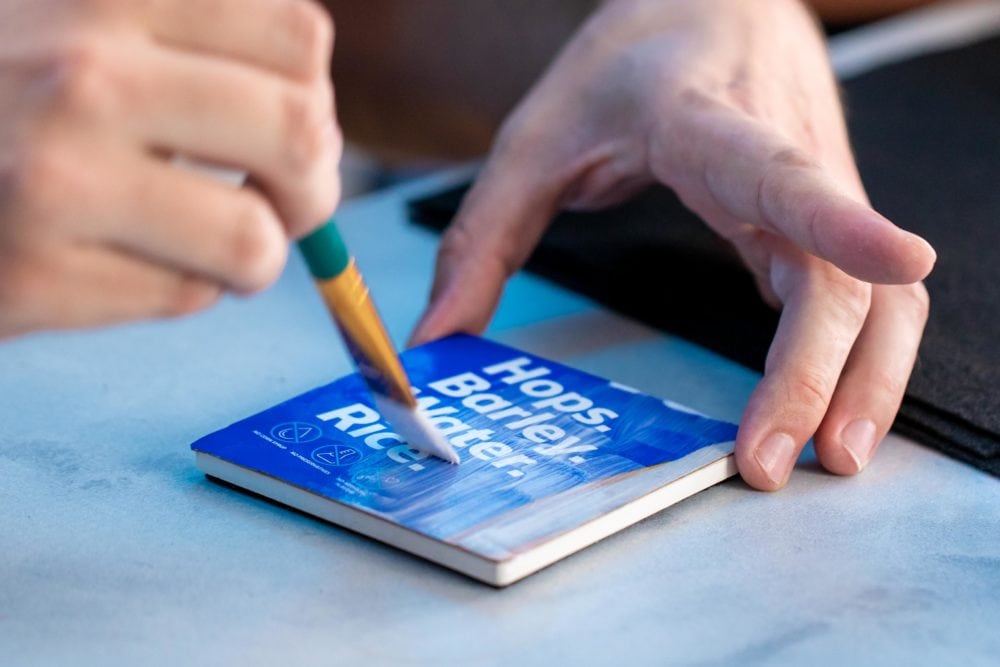
Step 8
You’re then going to flip the coaster back over to the side with the cardboard and, using the same brush, apply a coat of Mod Podge to seal the top and make the cardboard waterproof. Repeat this step 3-4 times, allowing 20 minutes to dry between each coat.
Step 9
If you’re going for a distressed look, now would be a good time to take 120 grit sandpaper and gently sand down the front and sides of the cardboard. This step can help eliminate brush strokes from the Mod Podge layers as well.
MORE: How to make a 3-D picture frame
Step 10
Once you’re pleased with the outcome of your coaster, brush on a coat of polyurethane gloss finish to give it a shiny, completed look.
Share your beer coaster creations with us by tagging @HomeOftheHolidays and #Holidays365.