


I’ve been making creative DIY tutorials for a few years now — but before I ever poured cement, sanded wood or painted a wall, I made pop-up cards. Lots and lots of pop-ups. I published tutorials and held live workshops, teaching crafters how to create three-dimensional illustrations out of two-dimensional materials.
Pop-up making (also called paper engineering) is all about turning simple cards and books into pure magic. From the outside, you have a seemingly innocent flat piece of paper, but when you turn the page, a 3D construction “pops” at you — surprising and so very pleasing. I think it’s safe to say that anything pop-up is by far better than anything not-pop-up.
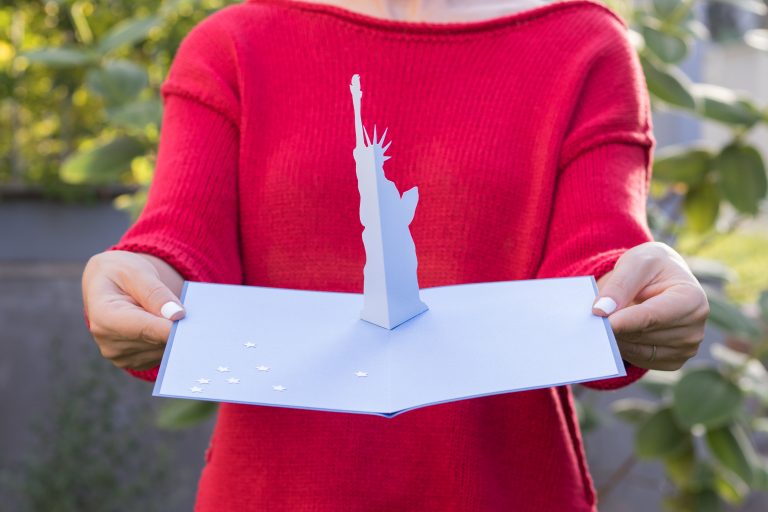
If you love hosting holiday gatherings, like 4th of July barbecues, Christmas parties and Thanksgiving dinners, why not surprise your guests with an unforgettable invitation pop-up card? I made this one with 4th of July in mind, but you can use the same technique with a simple Christmas tree, a funny turkey or carved pumpkin cutouts.
MORE: DIY star-shaped lanterns make the best backyard decor
Tools and materials
- Lady Liberty printable (Free! Just download the PDF below.)
- Card stock in different colors
- Tape
- Scoring tool (like a stylus or bone folder)
- Ruler
- Pencil
- Scissors
- Glue

Pop-up card directions
Step 1:
Print the downloaded Lady liberty printable (link below) at letter page size (8-1/2 by 11 inches) and 100 percent scale.
Lady Liberty Printable Template
Step 2:
Choose the paper color for the pop-up card’s base. If it’s not already letter-size, cut it down.
Step 3:
Fold the card’s base in half, and smooth it down for a crisp crease.

Step 4:
Cut the triangle from the template (continuous lined only) and set it aside to use as a guide later on.
Step 5:
Cut roughly around the statue’s figure, leaving a white outline around it. There’s no need to be accurate at this point.

Step 6:
Choose the paper for Lady liberty and tape the template down to it.

Step 7:
Place a ruler along the dashed lines. Using a stylus, a bone folder or even a paper clip, score the dashed lines firmly. Repeat on all dashed lines.

Step 8:
Using scissors (or a craft knife), cut around the statue’s continuous outline.

Step 9:
Fold all Lady Liberty’s scored lines into creases.

Step 10:
Place the triangle you cut earlier at the top of your base card. The dashed line should be aligned with the card’s center crease. Mark two short lines on both sides of the triangle’s point.

Step 11:
Place the Lady liberty cutout on the card. Lift the gluing tabs at the bottom, and place the figure so that one of the tabs is aligned with one of the pencil markings. Make sure the bottom tip of the statue’s center crease reaches the card’s base center crease.

Step 12:
Apply a little glue to the gluing tab and press to the card’s base.

Step 13:
Apply glue to the other gluing tab and close the card. Let the adhesive dry before opening the card.
MORE: Creative ways to customize shoes with ombre glitter & pom-poms
Step 14:
Decorate the inside and outside of the pop-up card as you please.

Before you go, learn how to draw like a pro from a comic artist: