


Celebrate the souls who have gone on by making your own Day of the Dead shrine (also known as an ofrenda) like this one created by Crafty Chica. With a few craft supplies and some colorful adornments, you can create a traditional altar that is believed to help the souls of those who have passed on have the best death possible after the celebration is complete.
These altars are a traditional craft made for Día de los Muertos (Day of the Dead), a Mexican holiday that takes place at the end of October and the beginning of November. The holiday focuses on celebrating the lives of loved ones who have passed away but are said to be allowed to walk among the living during the Día de los Muertos celebration.
ALSO CREATE: Spooky Day of the Dead skull wreath for your front door
This year, set aside an afternoon of crafting and contemplation to create a unique Day of the Dead shrine, which is made using a metal lantern, craft paint and assorted Día de los Muertos-inspired embellishments.
>> Click here to jump straight to the craft instructions
Paint the outside of the lantern
A metal lantern creates the base for the Day of the Dead shrine. Use vibrantly colored acrylic craft paint to decorate the lantern, then allow the paint to completely dry. Next, drill two holes in the bottom of the lantern and thread a piece of thin wire through the holes.

Cut cardstock and secure it inside the lantern
Create a floor for the shrine by cutting glittered cardstock to fit inside the base of the lantern. Secure the cardstock to the lantern with dry adhesive glue dots.

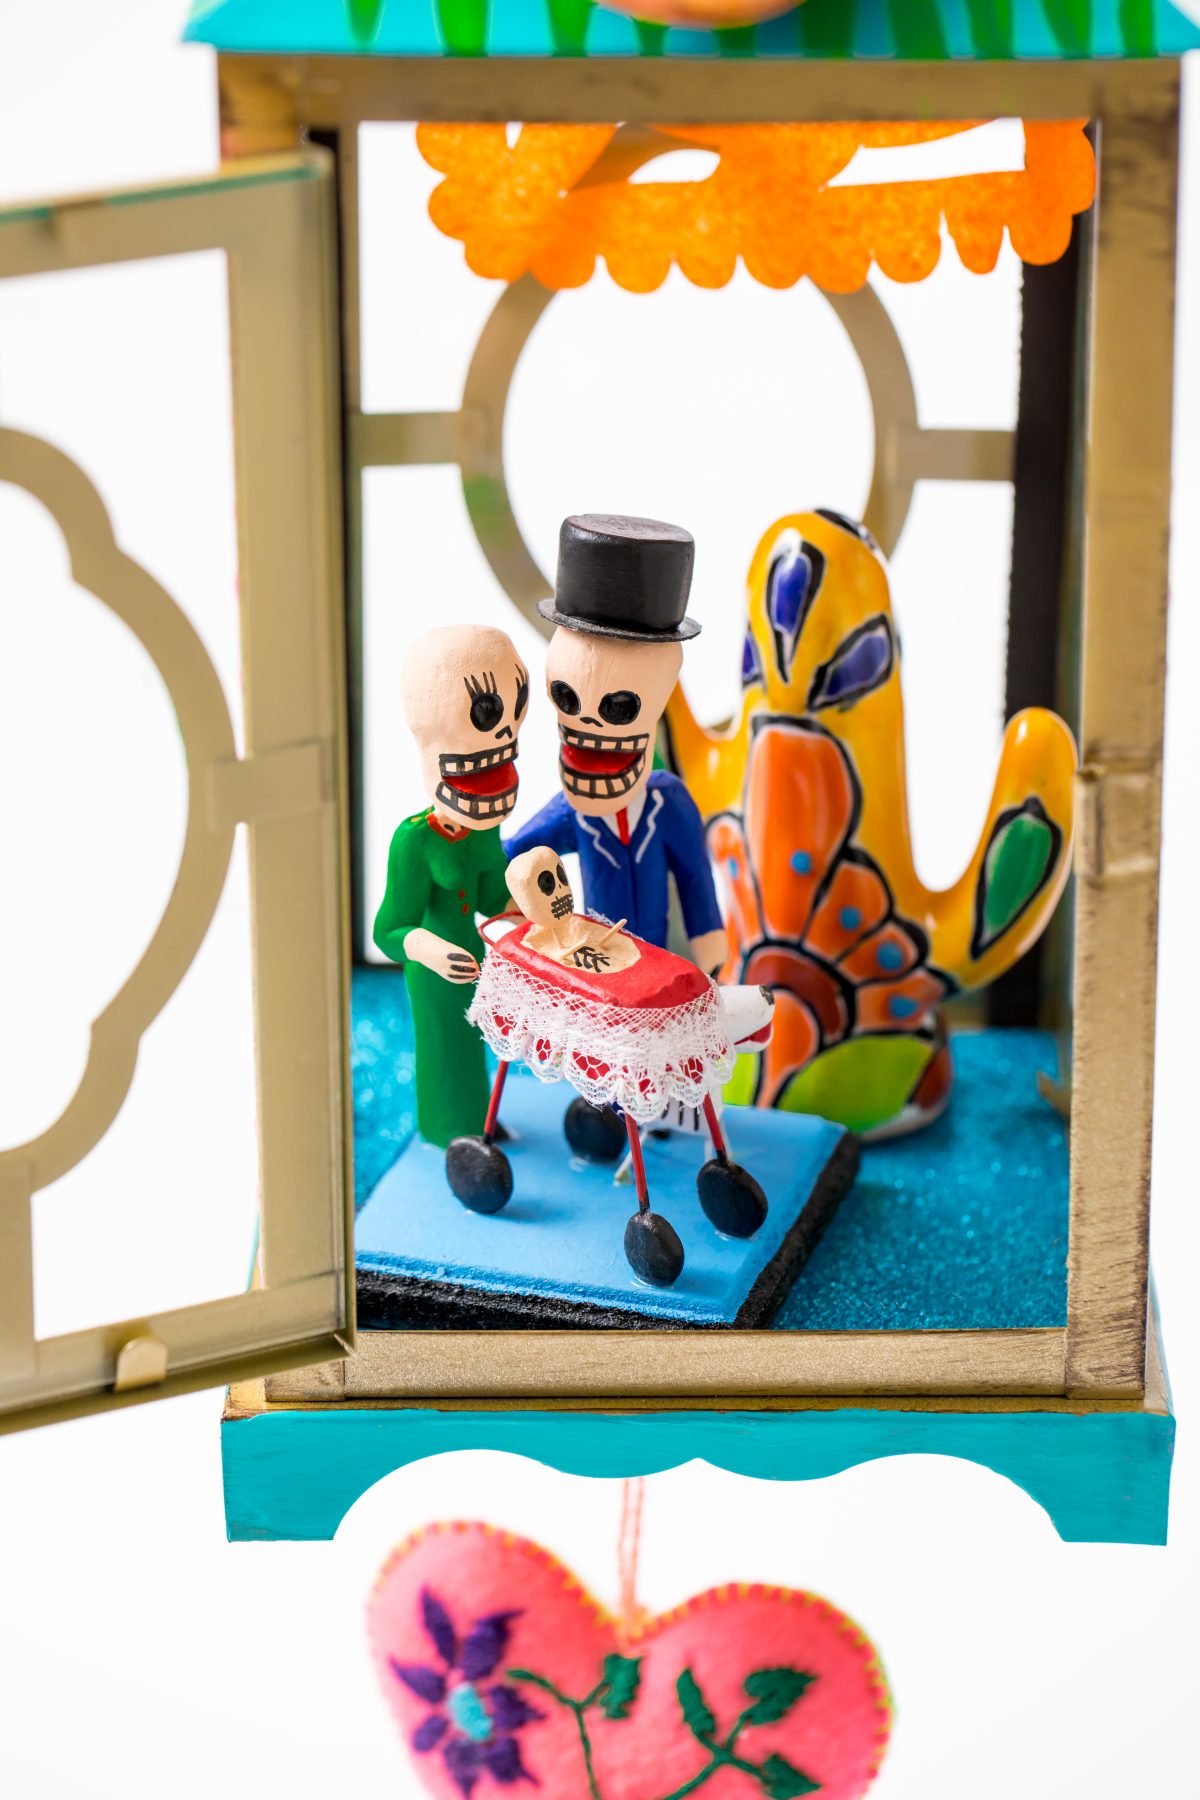
Add decorations inside the shrine
Now for the fun part! Create the scene inside the shrine. Add a larger Day of the Dead decoration (like a cactus or marigold) inside the back of the shrine and put the figurines up front. Use hot glue to secure the decorations.
Decorate the outside of the lantern
Now it’s time to finish the lantern with the rest of the decorations. Cut mini banners from the tissue paper (also known as “papel picado”) and use the dry adhesive to glue the banners around the outside of the lantern.

Hang an ornament from the wire from the bottom of the lantern
Insert the battery-operated tealight inside the lantern.

Such a unique Day of the Dead shrine craft

Vibrant colors pop!

Intricate detail in the embellishments

Give this beautiful craft a try!

Materials:
- Lantern
- Glittered cardstock
- Small Day of the Dead figurines
- Small decorations, such as a faux mini cactus or silk marigold flowers
- Craft paint
- Brushes
- Handheld rotary tool
- Wire
- Hanging ornament decoration
- Scissors
- Hot glue
- Dry adhesive dots
- Battery-operated tealights
- Colored tissue paper
Instructions:
- Paint the outside of the lantern and let dry.
- Drill two holes in the bottom of the lantern.
- Tie a piece of thin wire to the lantern.
- Cut the glittered cardstock to fit inside the lantern. Use the dry adhesive to secure it inside.
- Add the larger decoration inside the back of the shrine and put the figurines up front. Use hot glue
to secure. - Cut mini banners from the tissue paper and use the dry adhesive to glue around the outside of
the lantern. - Hang an ornament from the wire from the bottom of the lantern.
- Insert the battery-operated tealight inside the lantern.
